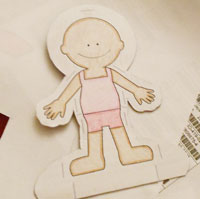
Here’s a simple tutorial on how to make paper dolls that will last a long time for hours of fun playtime.
How to Make Paper Dolls – Step 1
Download and print a blank paper doll template if you want to color it yourself or get one of the paper dolls to print that are already colored.
Step 2

Do as I say, not as I do!
Use the other side of the cereal box.
If you printed a blank paper doll template, color it in.
Then paste the doll onto a thicker backing such as cardboard before you cut the doll out.
An old cereal box works great, but make sure you glue the doll onto the plain brown side so that the printing on the box doesn’t show through your doll.
Step 3

Slice along the solid gray lines to make slits for the clothing tabs. Cut your paper doll out. Use an x-acto knife or very sharp scissors to slice the lines on the doll where the clothes tabs will slip through. Be careful not to cut yourself!
Step 4
Cut out two long pieces of cardboard to use as the stand for your paper doll. You may need to cut the lines at the bottom of the doll as you see fit so that the stand works.
Step 5

Print some free paper doll clothes out and cut them out. I have created many sets of paper doll clothing and they are all free to download from this site.
The tabs will probably be flimsy if you printed them on regular computer paper and this will make it difficult to put the clothes on the doll.
I recommend either gluing the clothes to very thin cardboard first or laminating them to make them a bit sturdier (or both!).
Tips for Sending the Paper Dolls to Sponsored Kids
- Label the back of all pieces, including the doll, with your child’s name and number.
- Laminate everything, including the doll, to make them last as long as possible. Don’t forget to re-cut the lines for the clothing tabs.
- Put everything in a plastic baggy or envelope so nothing gets lost.
- If you’re laminating, decorate the clothes with fun things like feathers, sequins, cotton balls, or very thin fabric. Get creative!
Add yourself to the Printable Treats Facebook page to get updates on new fun printables!


 Girly Word Search for Sponsored Child Birthdays
 Printable Cross and Heart Stationery
 Cinta Word Search
 Spring Flowers Stationery – Free to Print
 Race Car Stationery for Kids